Bluetooth and iPhone/iPod/AUX Kits for Toyota Prius 2004-2009
GTA Car Kit for Toyota Prius 2004, 2005, 2006, 2007, 2008 and 2009 is all you need to integrate your smartphone, tablet or mp3 player with your stock car stereo system.
We offer iPod/iPhone/iPad/AUX Wired kit with Bluetooth Extension port and Pure Bluetooth with AUX. Please refer to the table below to find detailed comparison between these two products.
We offer iPod/iPhone/iPad/AUX Wired kit with Bluetooth Extension port and Pure Bluetooth with AUX. Please refer to the table below to find detailed comparison between these two products.
INSTALLATION VIDEO INSTRUCTIONS
Pure Bluetooth Kit Installation and Usage for Toyota Prius 2004-2009
Disclaimer: install at your own risk
GTA Car Kits is not responsible and should not be liable for any damages caused to you or your vehicle during installation of the kit. All installation videos on this website and GTA Car Kit's YouTube channel provided as a reference only. If you don't feel comfortable with DIY installation - please contact a car audio professional in your local area.
iPhone/iPod Wired Kit Installation and Usage for Toyota Prius 2004-2009
Disclaimer: install at your own risk
GTA Car Kits is not responsible and should not be liable for any damages caused to you or your vehicle during installation of the kit. All installation videos on this website and GTA Car Kit's YouTube channel provided as a reference only. If you don't feel comfortable with DIY installation - please contact a car audio professional in your local area.
Bluetooth Extension installation/usage video for Toyota Prius 2004-2009
Disclaimer: install at your own risk
GTA Car Kits is not responsible and should not be liable for any damages caused to you or your vehicle during installation of the kit. All installation videos on this website and GTA Car Kit's YouTube channel provided as a reference only. If you don't feel comfortable with DIY installation - please contact a car audio professional in your local area.
Product Comparison: iPod/iPhone/iPad/AUX Wired VS Pure Bluetooth
| Feature | iPod/iPhone/iPad/AUX Wired | Pure Bluetooth with AUX |
|---|---|---|
| Audio Streaming | Audio Streaming Through Apple 30-pin connector or AUX 3.5mm cables. If you have newer Apple device - use 30pin to lightning adapter Optional Bluetooth Extension (sold separately) allows to stream audio wirelessly. | Audio Streaming Wirelessly through Bluetooth or through AUX 3.5mm cable |
| Track Switching | Track Switching From car stereo controls or steering wheel (iPod/iPhone/iPad only). Note: wireless streaming through Bluetooth Extension does not support switching tracks via car stereo controls. | Track Switching From car stereo controls and/or steering wheel for Bluetooth paired devices including iPhone and Android phones. |
| Sound Quality | Sound Quality CD quality or better | Sound Quality CD quality or better |
| Hands-free calling | Hands-free calling Requires Bluetooth Extension (sold separately) | Hands-free calling Supported. Receive calls and hang-up the phone via car stereo controls. |
| Charging | Charging Supported via Apple 30pin cable (only works with Apple products)Charging output: 5V 1A | Charging Built-in USB charging port (charging cable not included in the kit)Charging output: 5V 1A |
| Kit Installation | Kit Installation Installation requires the removal of the stock radio and connecting the kit at the back via open external CD-changer port. Apple and AUX cables have to be wired outside. If installing Bluetooth Extension (sold separately) - microphone has to be wired as close to the driver's mouth as possible (preferably to A-pillar). | Kit Installation Installation requires the removal of the stock radio and connecting the kit at the back via open external CD-changer port. AUX Cable and optional Charging Cable have to be wired outside. Microphone has to be wired as close to the driver's mouth as possible (preferably to A-pillar). |
| Supported devices | Supported devices - All iPods, iPhones and iPads are supported. Earlier Apple devices require 30-pin Apple cable - AUX cable lets you connect any device with a 3.5mm jack - Bluetooth Extension (sold separately) supports any bluetooth-enabled device including Apple, Android, Windows and Blackberry phones and tablets | Supported devices - Any bluetooth-enabled device including Apple, Android, Windows and Blackberry phones and tablets- AUX cable lets you connect any device with a 3.5mm jack |
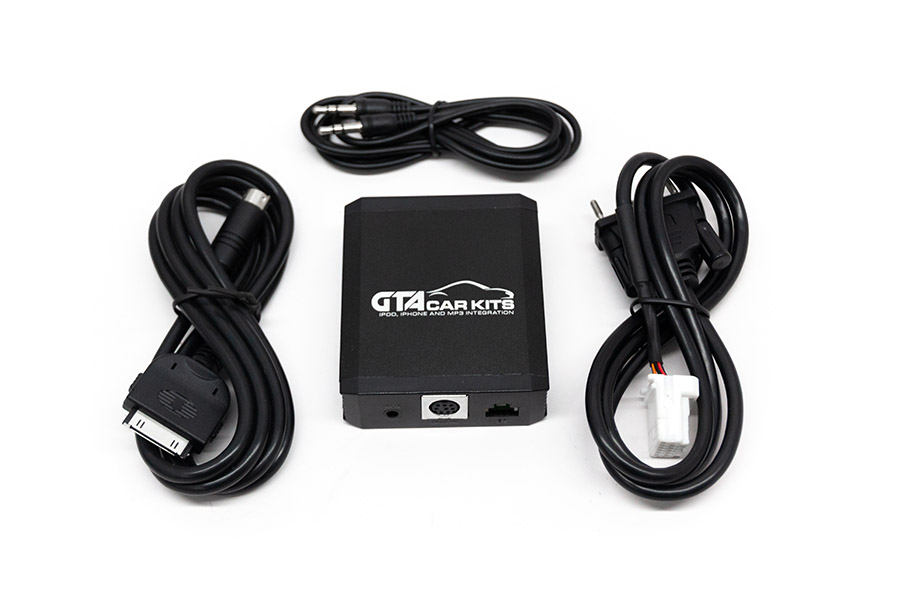
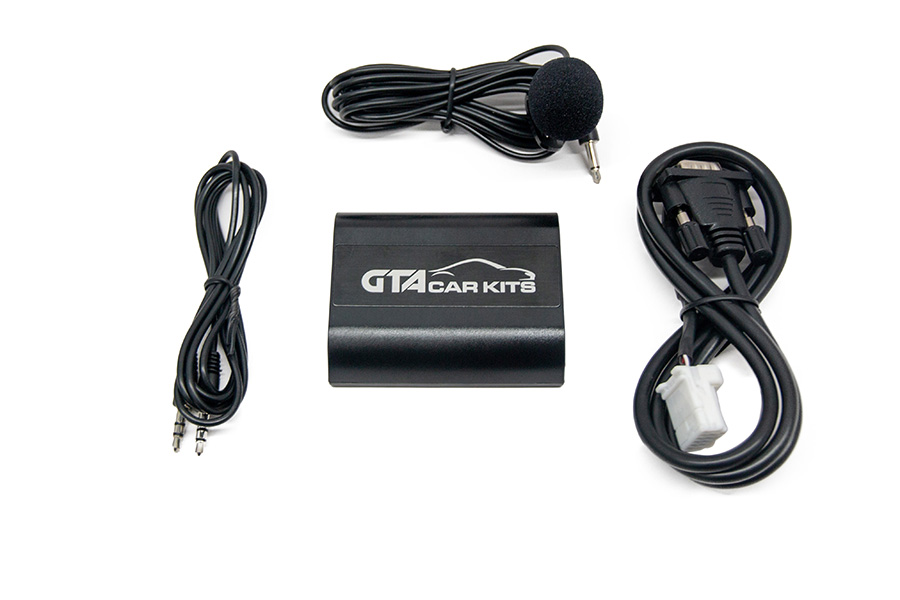
| Kit content | Kit content - Vehicle Specific Harness- Main Module - Apple 30-pin Cable - AUX cable - Splitter Y cable (only when XM or Navigation stereo type is selected) | Kit content - Vehicle Specific Harness- Main Module - AUX cable - Bluetooth Microphone - Splitter Y cable (only when XM or Navigation stereo type is selected) |
| Price | Price Starts at $84.99 USD | Price Starts at $139.99 USD |


Ryan Garcia (verified owner) –
HIGHLY RECOMMEND
2004 Toyota Prius Base (no navigation or JBL system)
It took me about 10 mins to install, I only took off the glove box, plastic piece with the air vent on the right side and the bottom plastic piece where the charger is at. I didn’t want the aux or mic so I just squeezed my hand in there and plugged it into the back. It connects immediately which came to a surprise to me because it is aftermarket. It is also sounds very good, I was nervous about that because other people had problems with it not being loud enough. It is definitely worth the money and better than spending hundreds on a new stereo.
Trevin (verified owner) –
I have researched all types of ways to add Bluetooth to my Prius. This was the most economical choice, as replacing the stereo would have been 3x this price. The install was easy. Set up was flawless. The sound quality is exactly as my stock system sounds. I am honestly impressed with this set up. Thanks for a quality product with a solid price tag!
Eric –
Overall, this is a good purchase at a good price when compared to the cost of installing an aftermarket stereo.
Pros:
– The sound quality is good
– The phone quality is good on both ends of the call
– No ambient buzzing noise like you get from bluetooth-to-aux or bluetooth-to-radio adapters
– You get to keep the stock stereo
– Nearly invisible install if you opt to not install the aux and charging cable portions (the only visible part in my Prius is the mic which is tucked away in the corner of my windshield)
– The install process is pretty simple even without experience (see installation tips below)
Cons:
– It is quiet compared to my previous bluetooth-to-aux setup. A volume of 20 on my previous setup is equivalent to a volume of 40 with the kit. Overall, it can still get very loud but there is not as much room to increase volume as my ’06 Prius maxes out at a volume of 55.
– It comes with a worryingly thin, fragile and short male-to-male aux cable. If this cable were to break, you would have to pull apart your whole dash again in order to replace it. I’d like to see this replaced with a more sturdy male-to-female aux cable so that if your aux cable breaks you can simply unplug from the exposed female end and plug in a new aux cable.
– It does not come with any USB cable for the charging port. While this port is marketed as an optional install, the aux is also technically optional yet an aux cable is included. I think a sturdy male-to-female USB3 cable would be a great addition to the kit.
– The install video glosses over some more minor details, and occasionally has bad angles. For example, when removing pieces such as the MFD it would have been nice to see where the host was grabbing the MFD to pull it. Another example would be with the mic which does not have a clip on it in the video. After a bit of messing around, I realized that the clip that comes on the mic is detachable but the video does not cover this.
Installation tips:
– Make sure you get a trim removal kit, trying to use a flathead screwdriver for trim removal will end badly.
– The vents are pretty fragile and don’t come off as easily as the video makes it look. I had the best luck starting on the with my removal tool on left side of the vent and moving right.
– If your Prius has a factory aux port, you do not need to install the aux from the kit. The factory aux port continues to work even after the kit is installed.
– When placing the car kit behind the stereo, be sure the mic cable is not touching the radio antenna. If they are touching, you will get crosstalk between the two wires and your phone calls will have radio playing in the background. I placed my kit with the mic input facing up and this seemed to do the trick.
– Make sure you test all the functionality you want to use *before* putting your dash back together.
Brian in Denver –
I bought this for my 05 Prius and I couldn’t be happier!
I followed the video and it was easy to install. I cursed at the video once I realized that it didn’t show how to put everything back together again
LOL
It was pretty easy to put it all back together. Steering wheel controls work, which is a BONUS! I also recommend the tool kit if you don’t already have any plastic pry bars.
I tested it before putting it all back together and it works great!
Eitan Tal (verified owner) –
Works like a charm. I had my doubts, but this product exceeded my expectations. Kudos to you, GTA Car Kits! 10/10 Perfect job!
Here’s why I’m pleased. It’s down to the technical details:
My car has a CD changer, but a close look reveals that I do NOT need the Y-Cable. I had my doubt because the empty connector only had 6 pins in it – one row populated, other row empty, while the GTA unit cable has all 12 pins populated. Everything tested OK including phone calls, aux option and next/prev buttons. No idea what the unconnected 6 wires do, but apparently they’re somehow not important in this configuration.
Kaan Genc –
Installed this on my Toyota Prius 2004 with the JBL stereo. I was able to install it by just pulling out the small panel between the glovebox and the stereo then putting my hand between the stereo, the small white box that’s holding a bunch of cables, and the vent. You can just feel around with your hand behind the stereo to find the empty socket and plug it in blind.
My only problem was that the car’s stereo did not immediately recognize the kit, but the customer supported suggested restarting the car a few times. I was skeptical at first, but a few tries later it actually worked!
I’m very happy with the sound quality, and all the steering wheel controls work too.
Tom –
Just installed the kit on my Prius 2011 Videos were really easy to follow. My kit arrived well within allocated time should thank GTA Car Kits for the excellent customer service. Now i can play music on my phone and get the crystal clear sound i always wanted. Thanks GTA Car Kit!
Jake –
I just installed the GTA car kit bluetooth, and it was a snap! I am not comfortable with tearing appart my dash, but with the videos, even I felt comfortable. I think it took me about 30-40 minutes. The only thing that was a bit confusing was that you have to have your phone paired to the GTA for the CD Changer mode to kick in. It just took me a few minutes to figure this out. It is amazing to listen to music that I enjoy piped through the car’s speakers. totally work every penny!
Lin Yar –
I’ve had this kit with bluetooth for over 6 months now and it was one of the best investments I’ve made into my car! Installation videos were extremely helpful and made the job a total breeze.
I LOVE being able to stream music and take phone calls in the car. Sound comes crystal clear and it’s transformed my 10 year old outdated factory stereo system on par with that of new cars today!
Thank you GTA Car Kits! I look forward to coming back for my future cars!
Tom T –
Hi,
Just installed this in my 2009 Prius yesterday and am very happy with the product. The vids above were super-helpful.
Definitely money well spent!
Thanks!
Ro –
I thought that I would not be able to do this, but I just did it in 10 minutes! I followed the advice to just pop out the lower glove box and panel. I had to unscrew a little bit by the vent to move that weird white box of wires, but it was easy from there, and it works!! Thanks!!
Drjrt –
I just installed this product in my 2005 Prius with basic OEM radio. As one of the above reviewers I went by the glove box approach. It was fairly easy but took more than 5 minutes. I removed the lower glovebox and the grey vent unit to the left of the glovebox. Neither requires tools. There is a large white wire block in your way which must be unscrewed before you can reach your hand behind the radio. There is a large Phillips-head screw at the top of the wire block that screws into a large tube. Once unscrewed you can get the device free and moved forward. With a small to medium sized hand you can get your hand behind the radio and plug the connector in blindly; refer to a picture of the back of the radio from a picture on the Internet. I tucked the GTA device behind the grey vent unit (above the 12volt outlet) and ran the wires out the bottom. So far looks and works great.
James S –
I did this on my prius 2005. It took about 5 minutes. I watched the video but decided to just remove the glove compartment and one plastic tabbed piece of dash. Then i reached around the back and inserted the cable where i could feel it ought to go (from having watched the video). Click. Has been working very well for 3 months. Worth trying this way over taking the whole thing apart.
Israel Osorio –
I took me less than an hour on my 2005 Toyota Prius with the biuldin 6Cd changer cause I was looking for tools and it was dead on with the step, except that my connector is not on the back of the radio is in a knot of cables behind it where the radio cables are at.It would of been simply if I knew, would of taken the whole screen only off but it was done, then I decided to leave the gta kit in the glove box and took the aux cable by closing the glove box im just waiting for my phone holder to arrive and I’ll be set so thanks for everything for the video.
Jay Berkenbilt –
I’d been eyeing this for a while and finally decided to take the plunge. I installed my GTA Car Kit last week on my 2005 Prius with navigation. I also purchased the bluetooth module. The installation was easy thanks to the installation video, and I’m very happy with the results. The sound quality is excellent, and the device works well. I really enjoy listening to music without any cables now, and I’m happy to stop using that old cassette adapter! The people at GTA car kits were prompt and friendly in response to a few questions I had along the way.
Mark Dyson –
Just installed your kit into my 2005 Prius with a basic radio. The procedure went flawlessly and your how-to video made things almost easy. I combined the installation with a dash-mounted portable XM radio and now I can listen to XM or my iPod depending on my mood, and no unsightly cables anywhere! Thanks, guys!
Patty M. from St. Paul, MN, USA –
“Thanks for the great product. I just finished installing a GTA Car Kit for my 2007 Prius and the sound is great! I had been trying to listen to my iPod 5 through a radio frequency–this is SO much better. I listen to music, lectures/iTunes U and audio books on my iPod, but could really only listen to music on the radio frequency adapter. Now I can listen to/hear them all clearly.
The customer service was great. I emailed a few questions about connections for an iPod 5 and the product and I got a timely response back. BTW–you can use your iPod 5 with the kit, but you need an official Apple 30 pin to flash plug adapter to connect it to the car kit cable (I found mine at Target). Ordering the kit was easy and shipping was fast.
Installing it was a little trickier for me than the video showed (he makes it seem so effortless), which was a little frustrating at first. After checking some other youtube videos on “radio installation” I realized that the car parts I needed to remove were just really tight and stiff. After a lot of wiggling, pulling and patience I did get them all out as shown on the video–with two exceptions. One is that the “screw” that is missing (we don’t see it in the video) is not really a screw (in the 2007 Prius anyway)–it’s like a plastic rivet. I had to pry it out using a flathead screwdriver, scratching and bending it a bit in the process. The second part was removing the part with the screen/buttons–I wiggled and pulled and pulled and pulled, I finally had to get my husband to pull it off for me; his hand strength is much better than mine–but being generous he said it was just getting the right angle. Putting it all back together was simple and quick.
Tip: I had my iPad with me so I could watch step-by-step, which was very helpful. All together is took me about 2 hours–however that did include drilling a hole in the little space under the radio. That was a great tip from the video–it stores away nicely and it easy to access.
I am really happy with the product, all-in-all it was pretty simple to install, and that coming from a 50 year old teacher/mom. I’m excited to be listening to audio books clearly on my upcoming 2000 ml. car trip!”
Daniel, Oakland CA USA –
“Oh my, you folks rock. Seriously, grateful that it only cost me 99$ USD to hook my Iphone 4s up to my 2004 Prius.
I called last week, someone answered my questions, then I ordered the kit. Item arrived this week and I just finished installing it.by myself. Well, actually, kept playing your tutorial video over and over on my mini. The video is spot on and I only lost one screw which says a lot since I am not the best with tools.
Hello to road trips with an endless soundtrack.
Thank you”
Manna –
“Found u guys online. Initially I was going to try to pull apart radio and book up aux cable if I could. But when I found the gta car kit, it was just so much easier and faster and safer! Lol
Shipping was very fast! I was impressed I got it so quickly!
I had a friend help me install it and it was extremely easy and the video was perfect! Took us like 30mins or less! I didn’t need to buy any extra tools and everything went smoothly! I’m running the cables out from the pocket right over the stereo. I think it’s the same place u can install tape player maybe? Lol.
I’m using my iPhone4 and my other friend has hooked up her iphone4s.
I really liked the video that shows u step by step so anyone can do it. It was efficient and very easy. And the customer service was spot on. Very fast and polite and probably the best customer service I have ever gotten from a website. And I already recommended GTA Car Kit to couple of friends!”
Sam from Rhode Island, USA –
“Just installed the GTA kit on a 2005 pruis with Nav. Bluetooth, JBL audio and CD changer. I could not be happier with the install.
I did an Audiovox Media Bridge install a month ago on my partners Honda Accord Hybrid and I think the overall design of the GTA kit is better, it is smaller and the connectors are of a higher quality.
Great Job!”
(comment received on Facebook wall)
Shadi –
“Hi GTA Car Kits..
Just installed the kit:-) I managed to install it without removing a lot of parts . Only the passenger lower glove box and the right vent. :-).
Its amazing . Sound quality is perfect , charge my iPhone 4S and my Nano 6th gen.
Thanks a lot again ..”
(comment received on Facebook wall)